Blog
Design the Ultimate Personalised Busy Board for Your Child’s Unique Playtime
Hello, fellow parents and caregivers! Are you ready to embark on an exciting journey into the world of sensory play? If you’re looking for a fun, educational, and engaging way to keep your little ones entertained, then you’ve come to the right place! Today, we’re diving into the wonderful world of busy boards—those delightful, interactive playthings that can be customized to fit your child’s unique interests and developmental needs. Let’s explore how to design the ultimate personalised busy board that will not only captivate your child’s attention but also foster their learning and creativity!
What is a Busy Board?
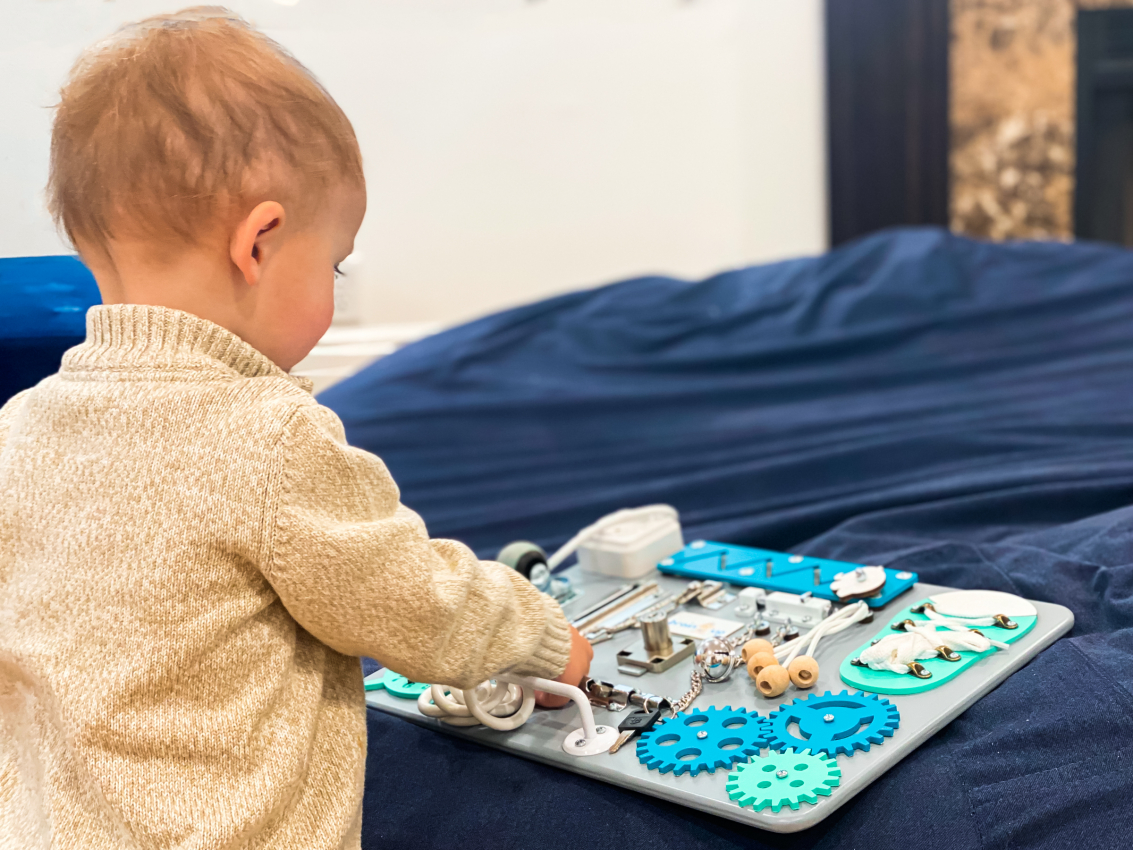
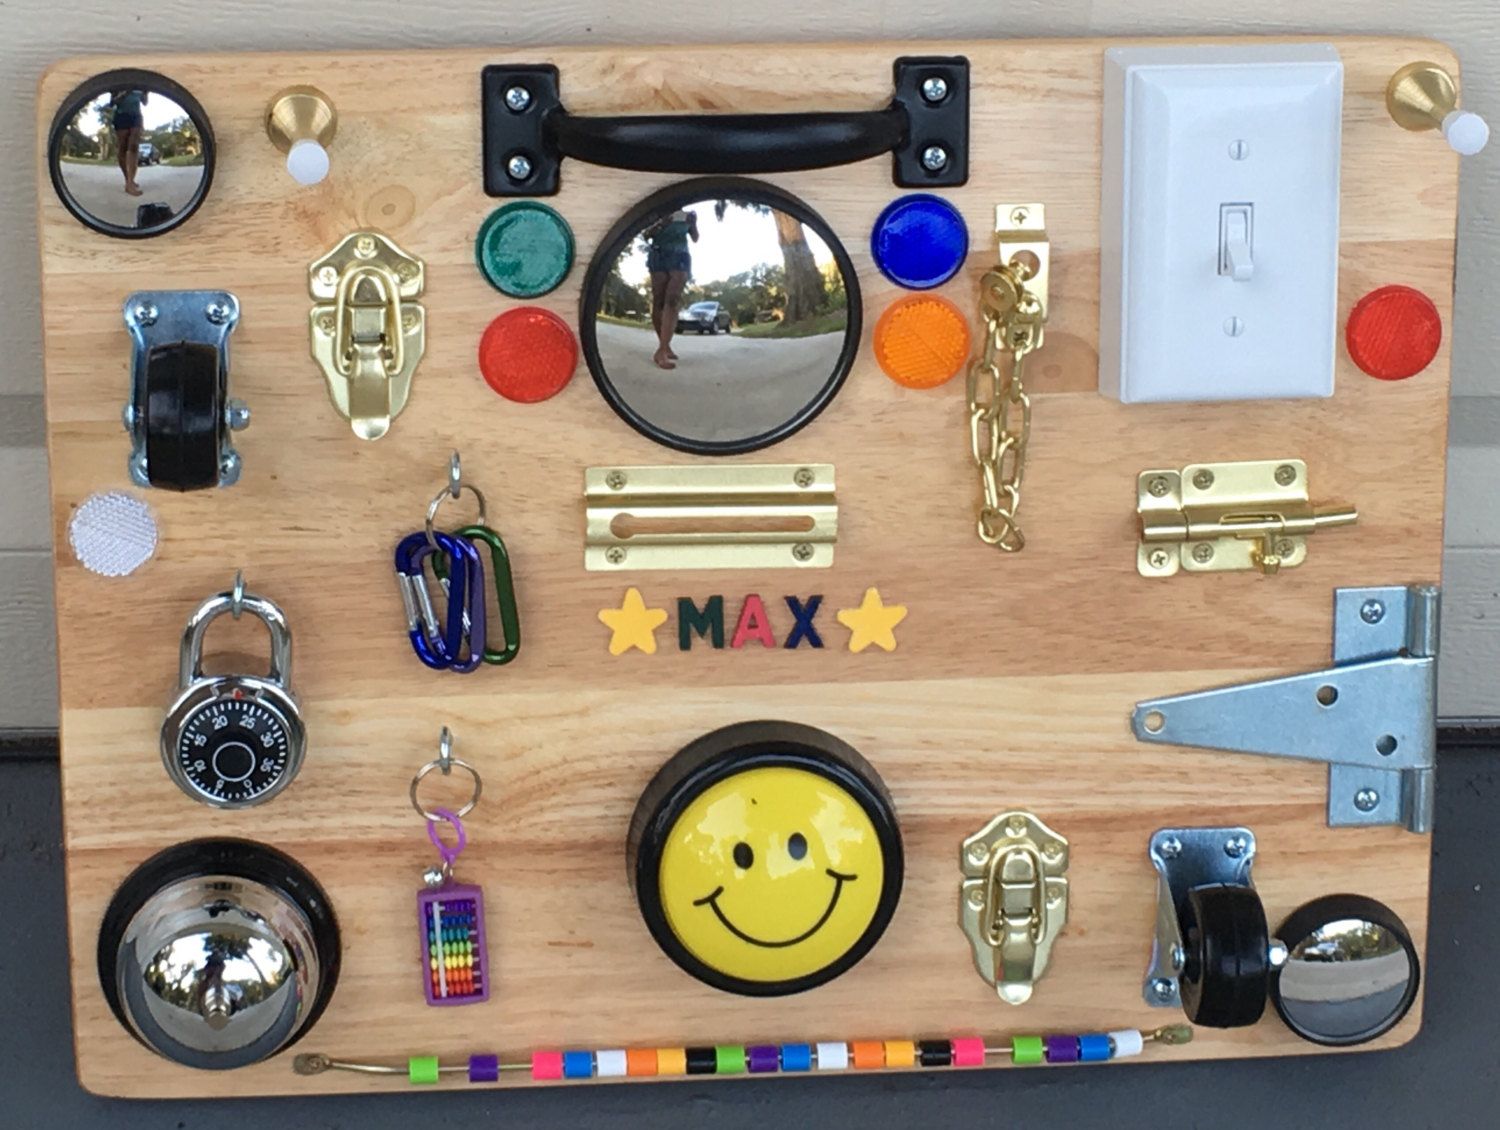
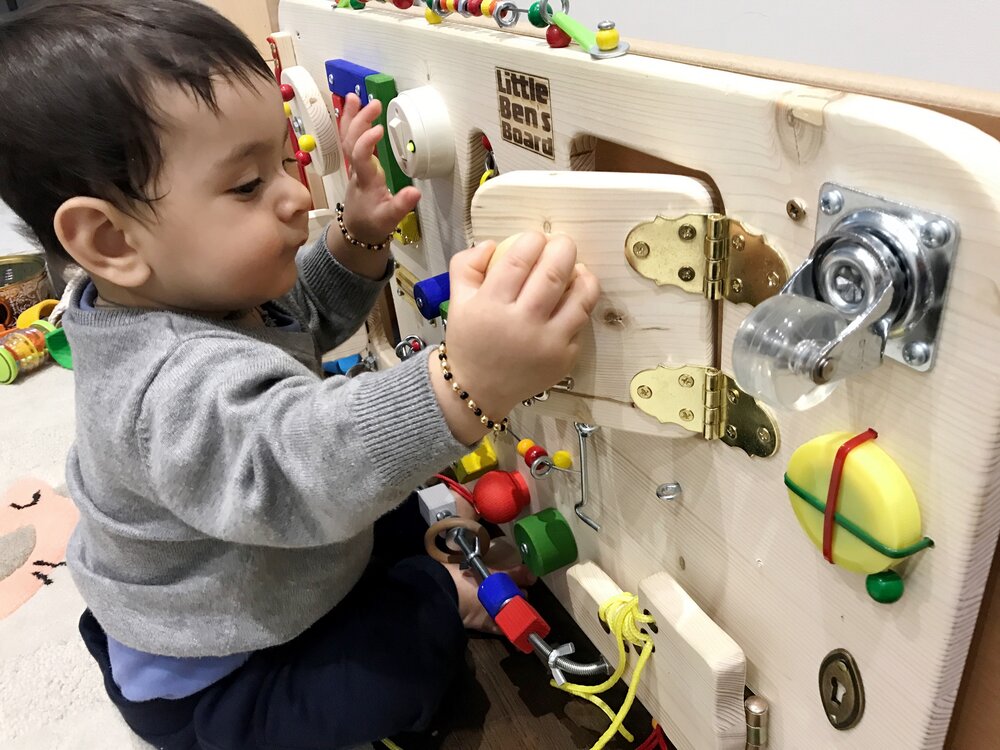
First things first, let’s clarify what a busy board is. A busy board, also known as a sensory board, is a tactile activity board filled with various objects and materials that encourage exploration and fine motor skill development. These boards can include anything from zippers and buttons to switches and locks, providing endless opportunities for your child to learn through play. The best part? You can create a personalised busy board that reflects your child’s personality, interests, and developmental stage!
>>>Buy now:
Why a Personalised Busy Board?
You might be wondering, “Why should I take the time to create a personalised busy board?” Well, let me tell you—it’s all about catering to your child’s unique needs and preferences! Every child is different, and a one-size-fits-all approach often misses the mark. By designing a personalised busy board that resonates with your child’s interests, you’re not only making playtime more enjoyable but also enhancing their learning experience. Here are a few reasons why a personalised busy board is a fantastic idea:
- Tailored Learning: A personalised busy board can be customized to focus on specific skills your child is developing, whether it’s fine motor skills, problem-solving, or sensory exploration.
- Engagement: When children see their favorite colors, themes, or characters on their personalised busy board, they’re more likely to engage with it and spend time playing.
- Creativity: Personalizing a busy board allows you to get creative! You can incorporate different materials, textures, and themes that reflect your child’s interests.
- Bonding Experience: Involving your child in the design process can be a wonderful bonding experience. You can discuss what they like and want to include, fostering communication and collaboration.
>>>Read more: Teach Your Child Responsibility and Boost Confidence with this Simple Daily Task: Setting the Table

Designing Your Ultimate Busy Board
Now that we’ve established why a personalised busy board is a great investment, let’s get down to the nitty-gritty of designing one! Here’s a step-by-step guide to help you create the ultimate busy board tailored to your child’s unique playtime:
Step 1: Gather Your Materials
Before you start building, it’s essential to gather all the materials you’ll need. Here’s a list of items you might consider:
- Baseboard: A sturdy piece of plywood or a large canvas board to serve as the foundation.
- Fasteners: Screws, nails, or glue to attach items securely.
- Objects: Think about what your child loves! Here are some ideas:
- Zippers, buttons, and snaps
- Locks and keys
- Switches and dials
- Mirrors and photos
- Wheels and gears
- Textures (fabric, sandpaper, bubble wrap)
- Musical instruments (bells, tambourines)
Step 2: Choose a Theme
Choosing a theme can make the personalised busy board even more exciting! Here are some fun theme ideas to consider:
- Nature: Incorporate natural elements like leaves, stones, and flowers. You can even add a small birdhouse or a mini garden.
- Adventure: Create a board with a transportation theme, including toy cars, trains, and road signs.
- Under the Sea: Use blue and green colors, and add sea creatures, shells, and waves.
- Space Exploration: Decorate with stars, planets, and rockets, and include elements like switches that mimic spaceship controls.
Step 3: Plan the Layout
Before you attach anything, lay out the items on the board to see how they fit together. Consider the following:
- Height and Reach: Make sure the items are at an appropriate height for your child to reach comfortably.
- Variety: Include a mix of textures, colors, and types of activities to keep things interesting.
- Flow: Arrange the items in a way that encourages exploration and movement. For example, you might want to place items that require different skills next to each other.
Step 4: Secure the Items
Once you’re happy with the layout, it’s time to secure everything in place. Use screws or strong glue to attach the items firmly to the board. Make sure there are no sharp edges or small parts that could pose a choking hazard. Safety first!
Step 5: Personalize and Decorate
Now comes the fun part—personalizing your busy board! Here are some ideas to make it truly unique:
- Add Your Child’s Name: Use colorful letters to spell out your child’s name or initials at the top of the board.
- Incorporate Photos: Attach family photos or pictures of your child’s favorite things to make the board feel special.
- Use Bright Colors: Paint the baseboard in vibrant colors or add decorative elements like stickers or washi tape.
Step 6: Introduce the Busy Board
Once your personalised busy board is complete, it’s time for the big reveal! Introduce it to your child and encourage them to explore. You can guide them through the different activities, showing them how to use each item. Make it a fun learning experience, and don’t forget to take pictures of their excitement!
Tips for Ongoing Engagement
Creating a busy board is just the beginning! Here are some tips to keep your child engaged with their personalised playtime masterpiece:
- Rotate Items: To keep things fresh, consider rotating some of the items on the board every few weeks. This will maintain their interest and challenge them to explore new skills.
- Incorporate Learning: Use the busy board as a springboard for learning. For example, if they love the transportation theme, you can talk about different modes of transport or even take a field trip to a local train station.
- Encourage Imaginative Play: Invite your child to create stories or scenarios using the items on the board, fostering their creativity and language skills.
Conclusion
Designing a personalised busy board for your child is a fantastic way to encourage exploration, creativity, and learning through play. It’s a project that not only provides endless hours of entertainment but also fosters important developmental skills. So gather your materials, unleash your creativity, and get ready to create a unique playtime experience for your little one!
Remember, the ultimate goal is to make playtime enjoyable and enriching. Happy crafting, and may your personalised busy board bring joy and learning to your child’s playtime adventures!