Chưa được phân loại
DIY Velcro Busy Board: Fun, Engaging, and Super Easy to Make!
Hey there, crafty parents and DIY enthusiasts! If you’re looking for a fun project that will keep your little ones entertained while also fostering their creativity and fine motor skills, then you’ve landed in the right place. Today, we’re diving into the world of DIY Velcro busy boards—those fantastic, interactive boards that can hold your child’s attention for hours and hours. Let’s roll up our sleeves and get started! 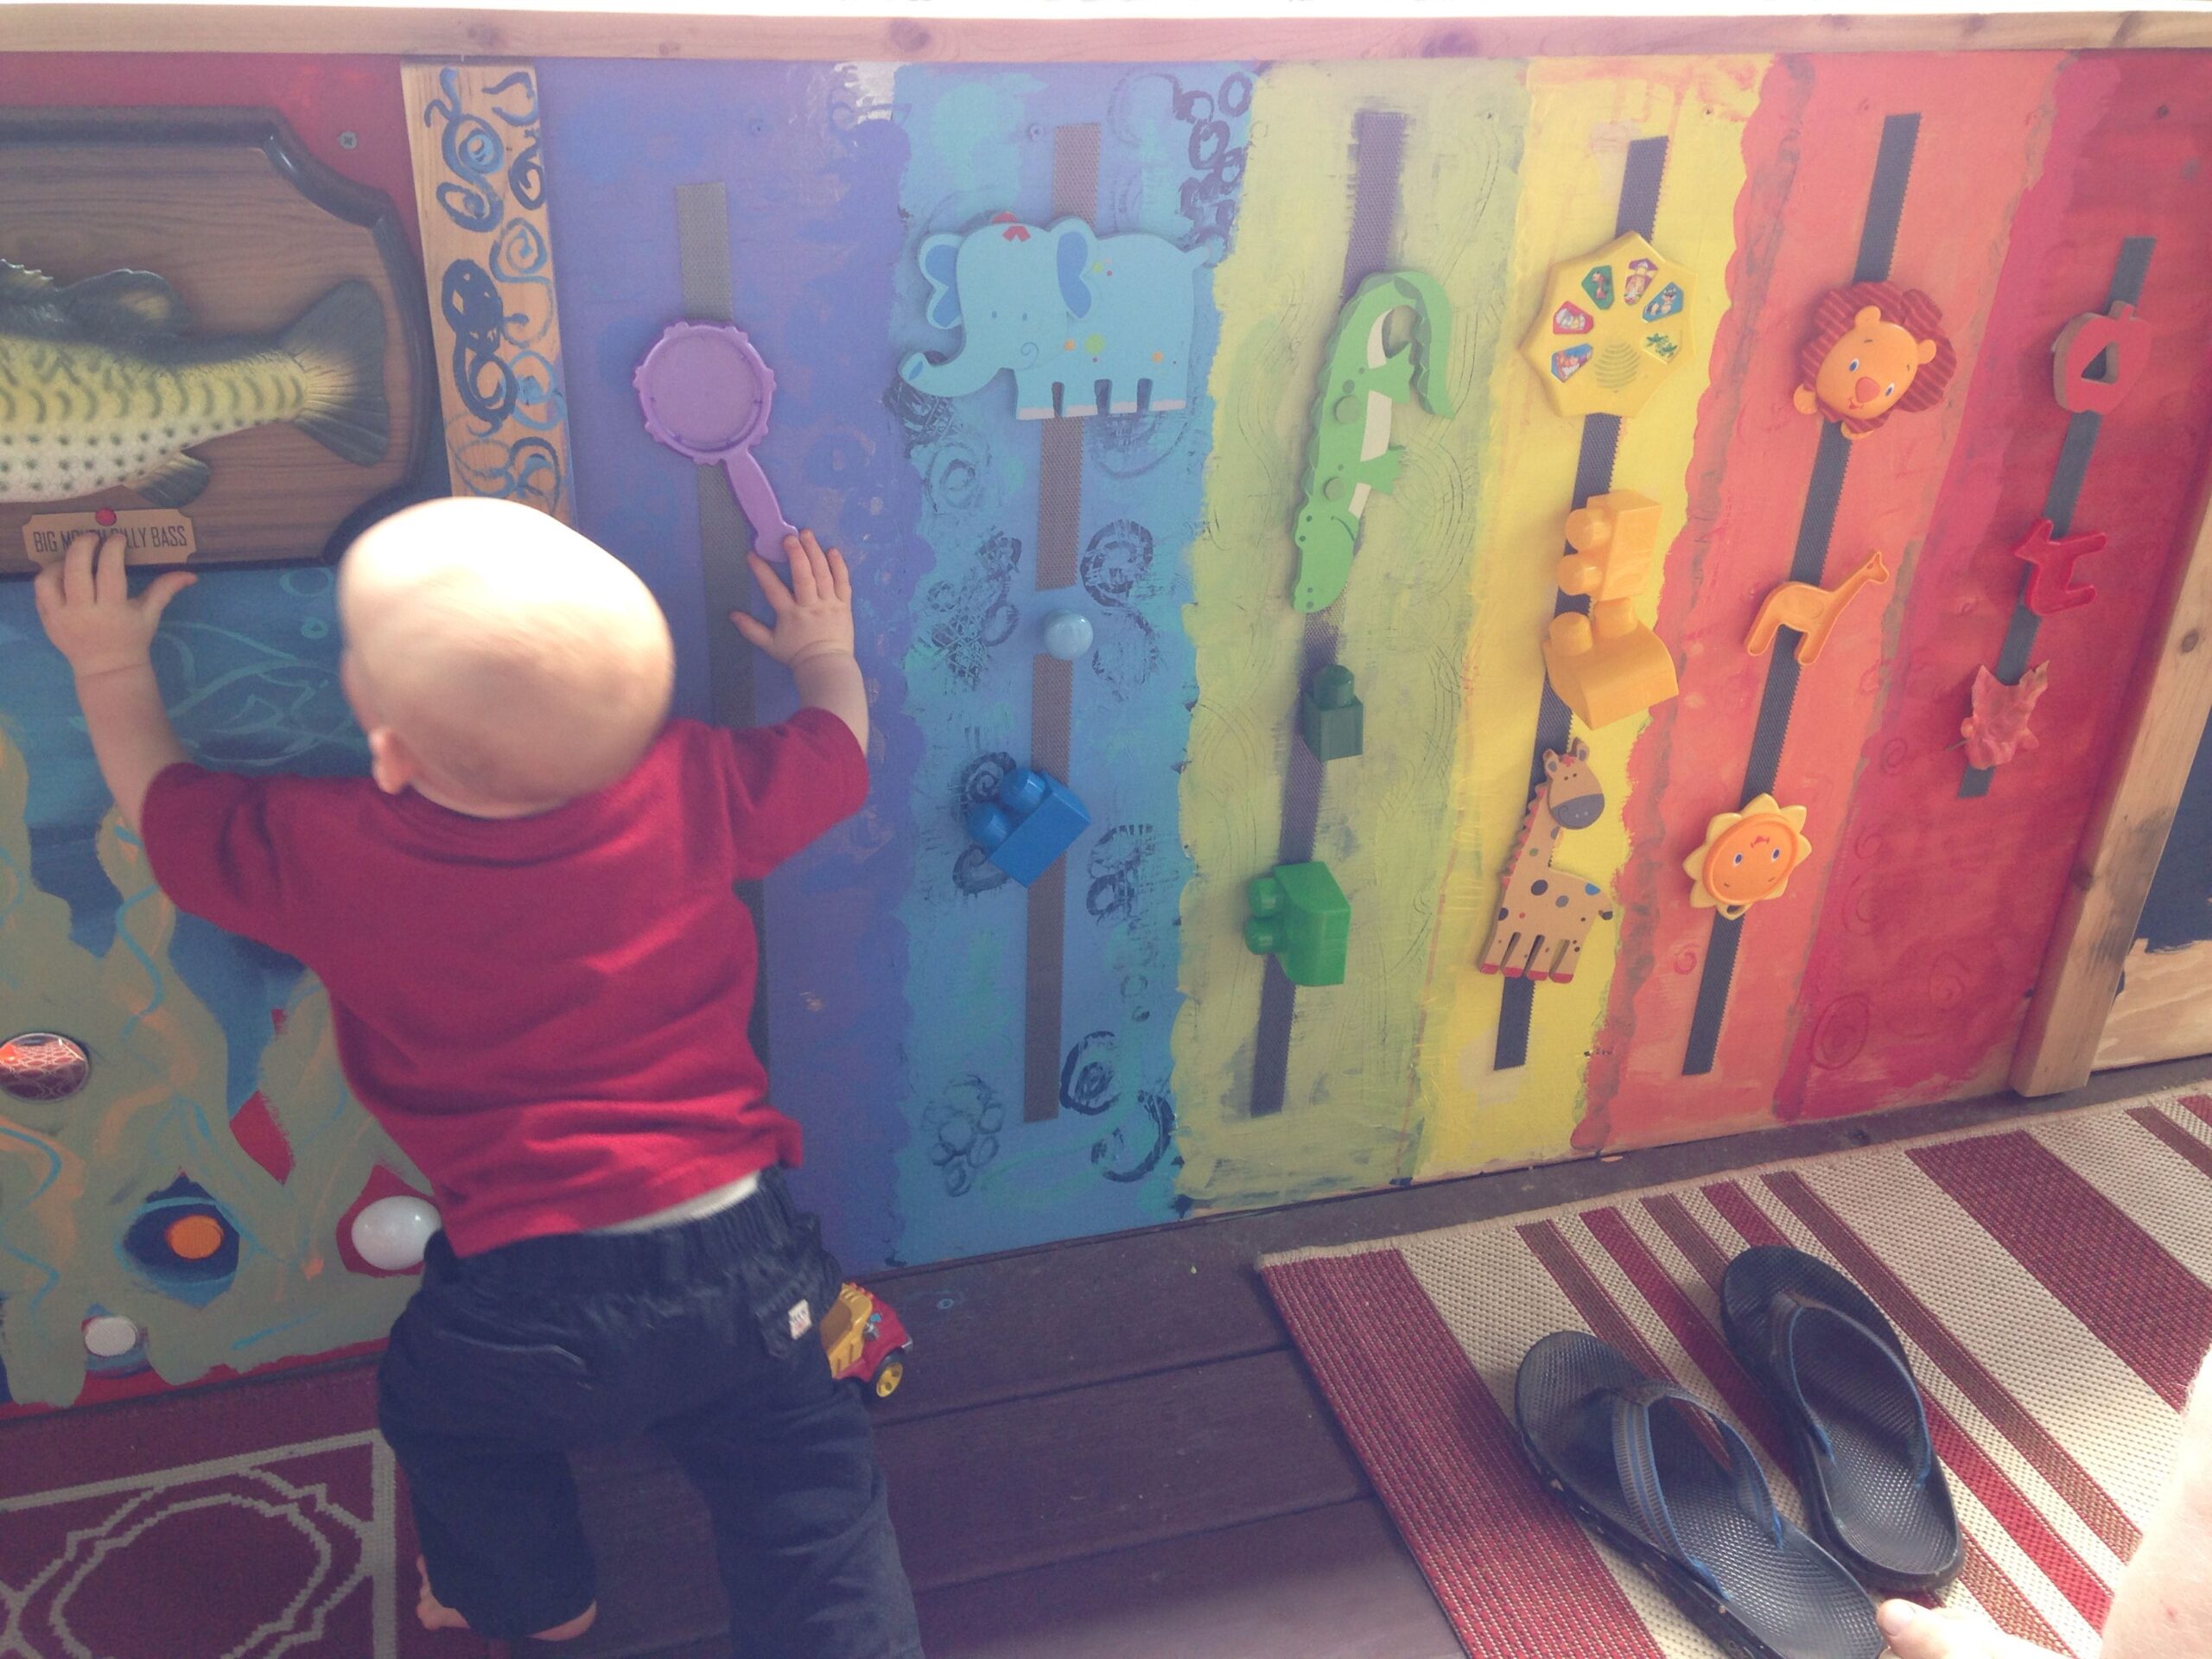
What Exactly is a Busy Board?
Before we jump into the DIY part, let’s break down what a busy board actually is. Imagine a board covered with all sorts of items that kids can touch, twist, pull, and play with. Busy boards are designed to keep little hands busy and little brains engaged. They often include different activities that promote sensory exploration and fine motor skills.
Velcro busy boards, in particular, incorporate Velcro strips that allow you to attach and detach various elements. This setup adds an exciting layer of interaction, as kids can stick things on and off, creating a playful experience that actively engages them.
>>>Read more: Unlock Your Child’s Motor Skills with a Fun Montessori Activity: Hammering
Why DIY?
Now you might be wondering, “Why should I go the DIY route?” Well, there are plenty of reasons!
- Customization: You can tailor your busy board to your child’s interests and abilities, including their favorite colors, themes, or characters. Want a dinosaur-themed busy board? You got it! Prefer something animal-based? You can do that too!
- Budget-Friendly: Buying pre-made busy boards can get pricey, and the options often don’t fully meet your child’s preferences. DIYing it is a great way to keep costs down while creating something unique.
- Quality Time: It’s an excellent opportunity to bond with your child. You can work together on the project, with your little helper choosing materials and activities. Plus, seeing the joy on their face when they play with something you created together is priceless!
- Creativity Unleashed: Get those creative juices flowing! You’ll have the chance to experiment with different materials, design layouts, and come up with new activities.
What You’ll Need
Alright, let’s gather some supplies! Here’s a list of materials you’ll need to get started:
For the Board:
- A sturdy base (think plywood, canvas board, or thick cardboard)
- Paint or fabric (optional, to decorate your base)
Velcro Supplies:
- Velcro strips (self-adhesive are easiest!)
- Velcro dots or patches (great for attaching items)

Fun Add-Ons:
- Different textures (e.g., pieces of fabric, sandpaper, bubble wrap)
- Everyday items (think old keys, bottle caps, small toys)
- Craft items (pom-poms, construction paper, pipe cleaners)
Tools:
- Scissors
- Hot glue gun (for anything that needs extra sticking power)
- Markers or paint (for customization)
And that’s it! So simple, right?
Step-by-Step: Making Your Busy Board
Step 1: Prepare Your Board
Take your base material (plywood or thick cardboard) and, if you want, give it a fresh coat of paint or cover it with some fun fabric. Just make sure whatever you use is washable and sturdy enough to withstand little fingers! Let it dry completely if you’ve painted it.
Step 2: Plan Your Layout
Before attaching anything, lay out your items to visualize the final product. It helps to create a balance and makes sure everything fits well together. Try to incorporate various activities that will engage your child’s senses and motor skills. Maybe some fun Velcro animals that they can match together, a shape sorter, or even a few simple puzzles!
Step 3: Secure the Velcro
Once you’re happy with your layout, start attaching the Velcro strips to the board. You can either stick the Velcro directly onto the items you’ve chosen and then onto the board, or just stick the Velcro to the board itself and let your child attach items as they play. It can be a fun surprise for your child to discover what’s Velcroed there!
Step 4: Add Textures!
Using different textures can make the board even more engaging. Attach a piece of sandpaper, or glue a piece of fuzzy fabric for something they can touch and feel. Think outside the box—old zippers or buttons can also add some tactile variety!
Step 5: Personalize It!
This is the stage where you and your little one can let your creativity shine. Decorate the board with drawings, stickers, or favorite photographs. You could even add the child’s name or initials to make it feel special.
Step 6: Throw It A Party!
Once everything is in place and secured, it’s time for the grand reveal! Take it over to your child and watch their eyes light up. Encourage them to interact with the board, showing them how to use the Velcro pieces and exploring the various activities you’ve incorporated.
Tips for Success
- Supervise: For younger kids, always supervise to ensure they don’t put small items in their mouths.
- Switch It Up: As your child grows, rotate out some of the activities or add new ones to keep their interest piqued.
- Keep it Clean: If your board includes items that can’t be cleaned easily (like small toys), consider making them removable so you can wash them separately as needed.
- Get Creative Together: Involve your kids in the decision-making process! Let them choose what they want on the board and get their input on designs.
Conclusion
Creating a DIY Velcro busy board is not just an arts and crafts project; it’s a versatile tool for learning and development. It fosters creativity, engages fine motor skills, and provides countless opportunities for play. Plus, nothing beats the joy of creating something unique and personal.
So, are you ready to create some fun? Grab your materials, crank up some tunes, and let the crafting begin! Your little one is going to love their new board, and you’ll have loads of fun making it together. Happy crafting!