Blog
Make Your Own Custom Busy Board for Toddlers
Hey there, fellow parents and caregivers! If you’re looking for a fun, creative way to keep your little ones engaged while also fostering their fine motor skills and cognitive development, then you’ve come to the right place. Today, we’re diving headfirst into the delightful world of busy boards! These hands-on learning tools are a fantastic way for toddlers to explore, experiment, and most importantly, stay busy. And the cherry on top? You can make your very own custom busy board right at home!
What is a Busy Board, Anyway?
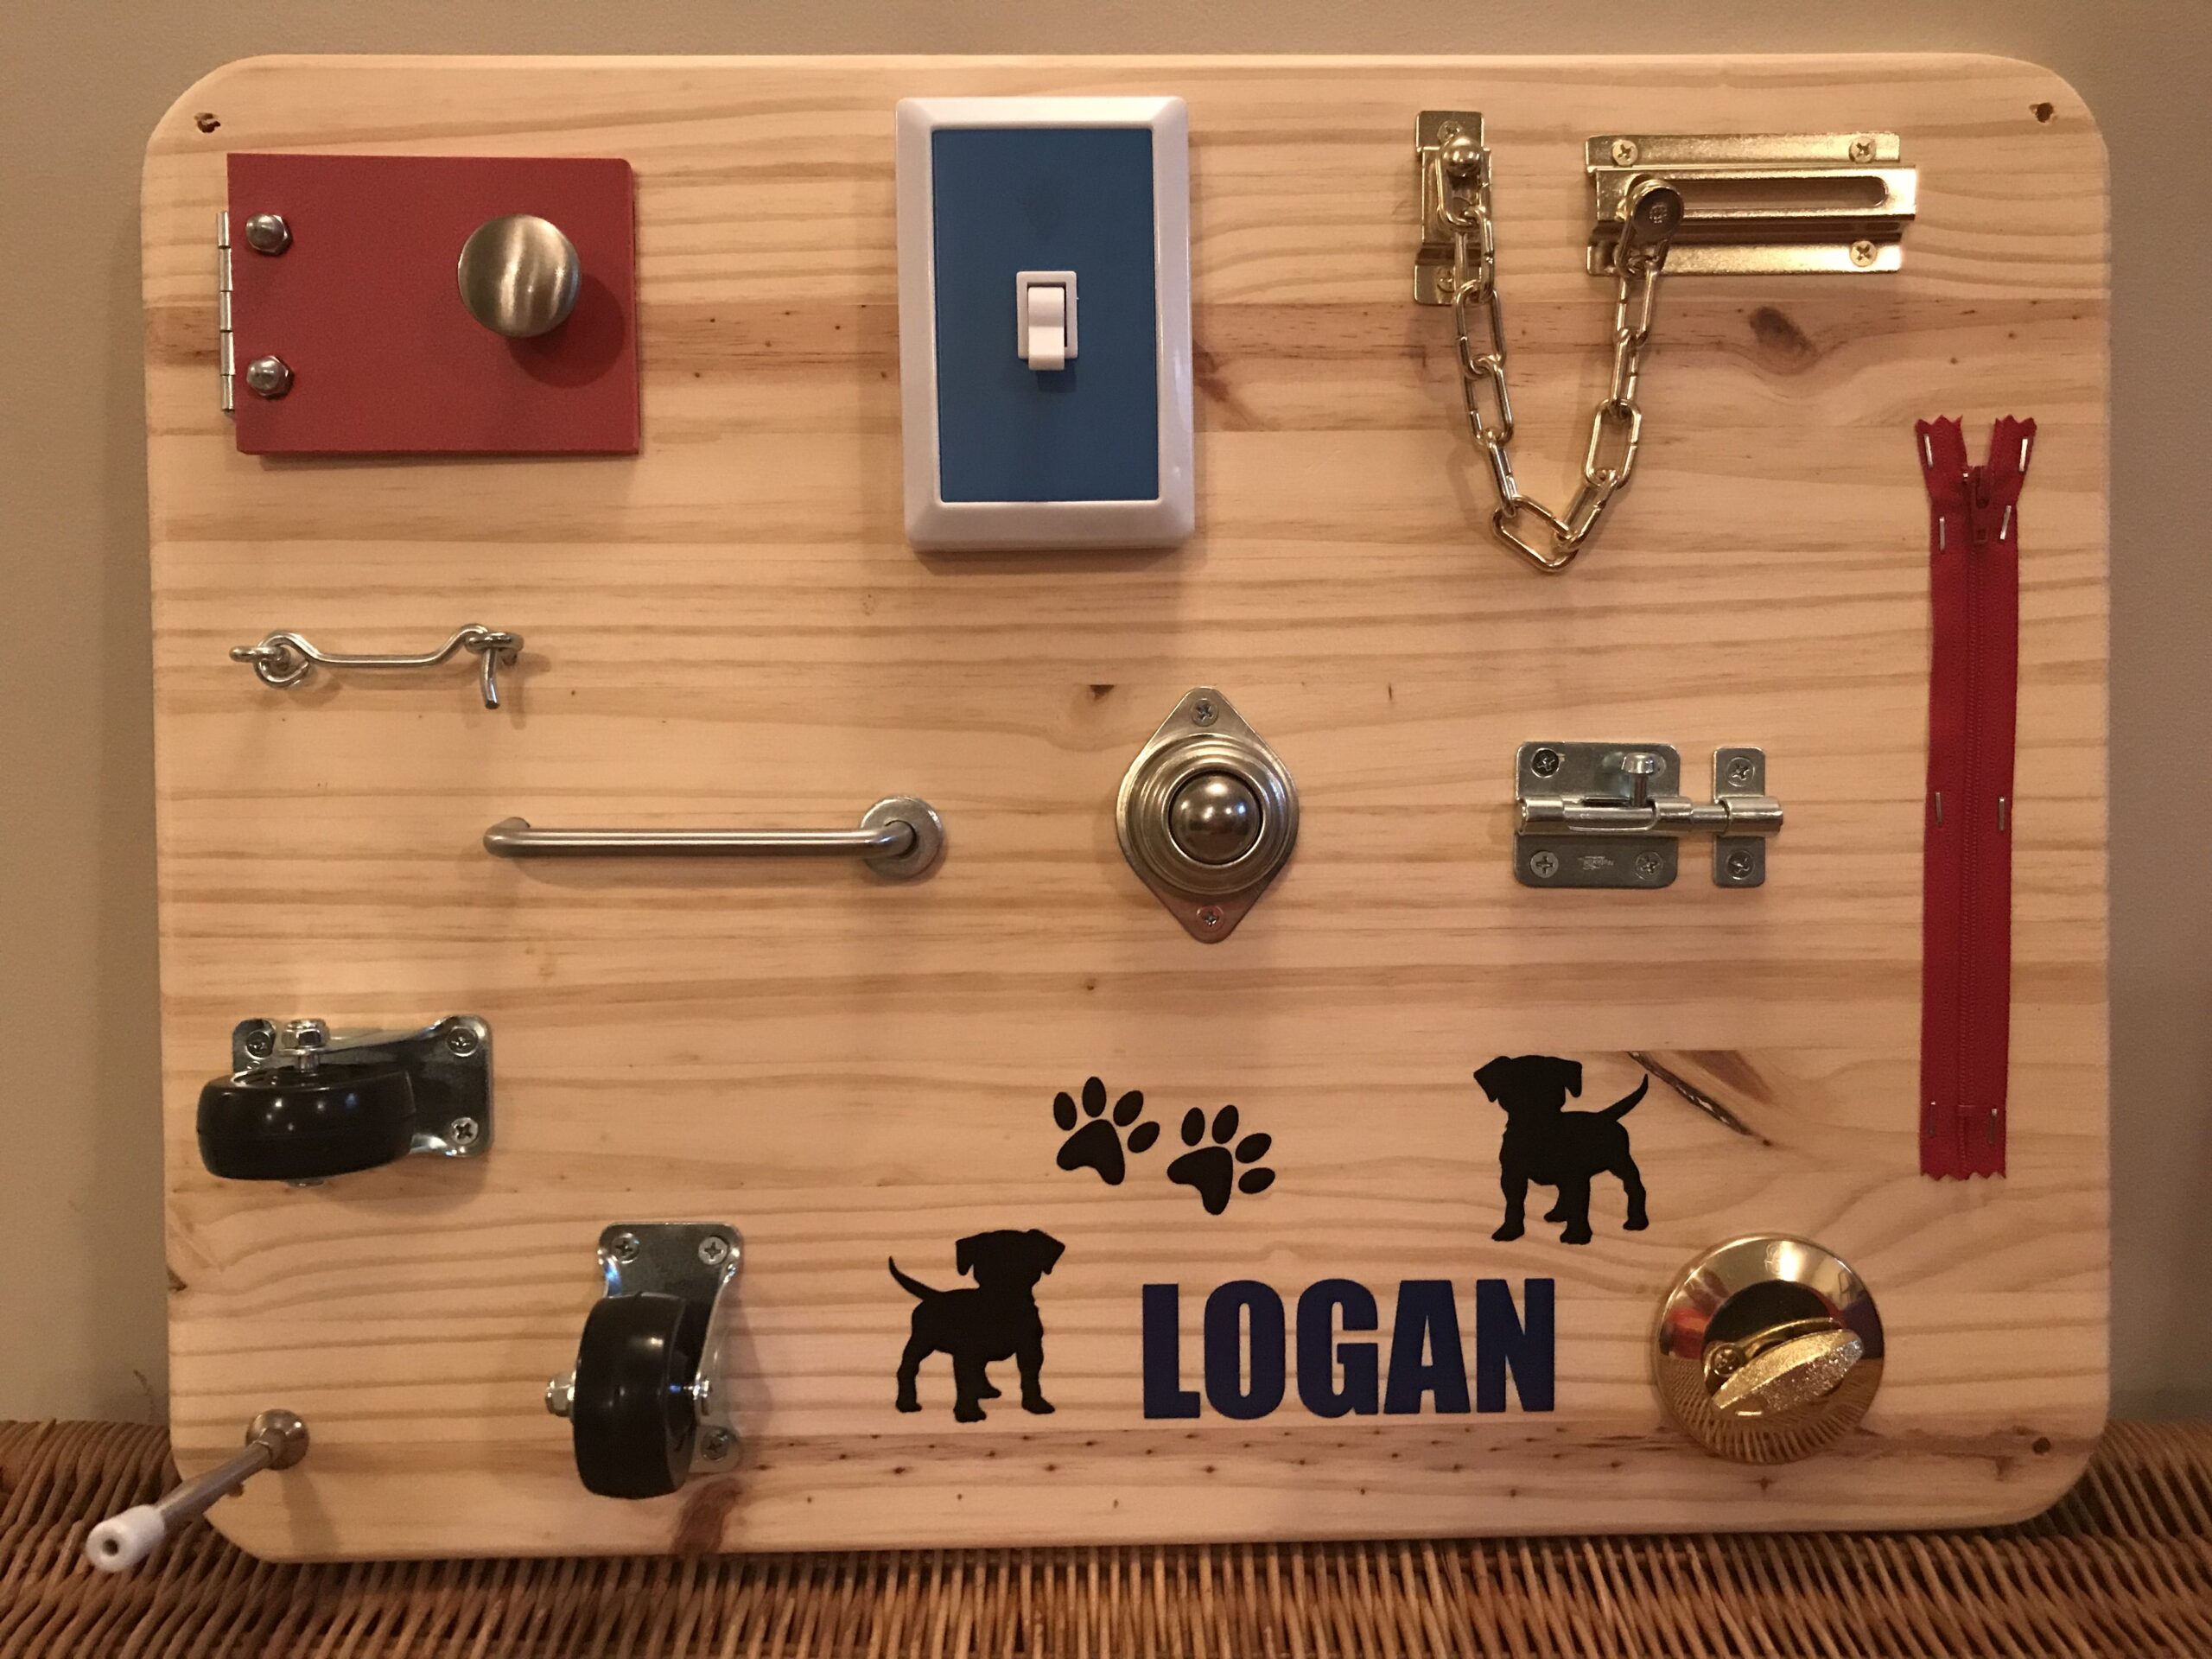
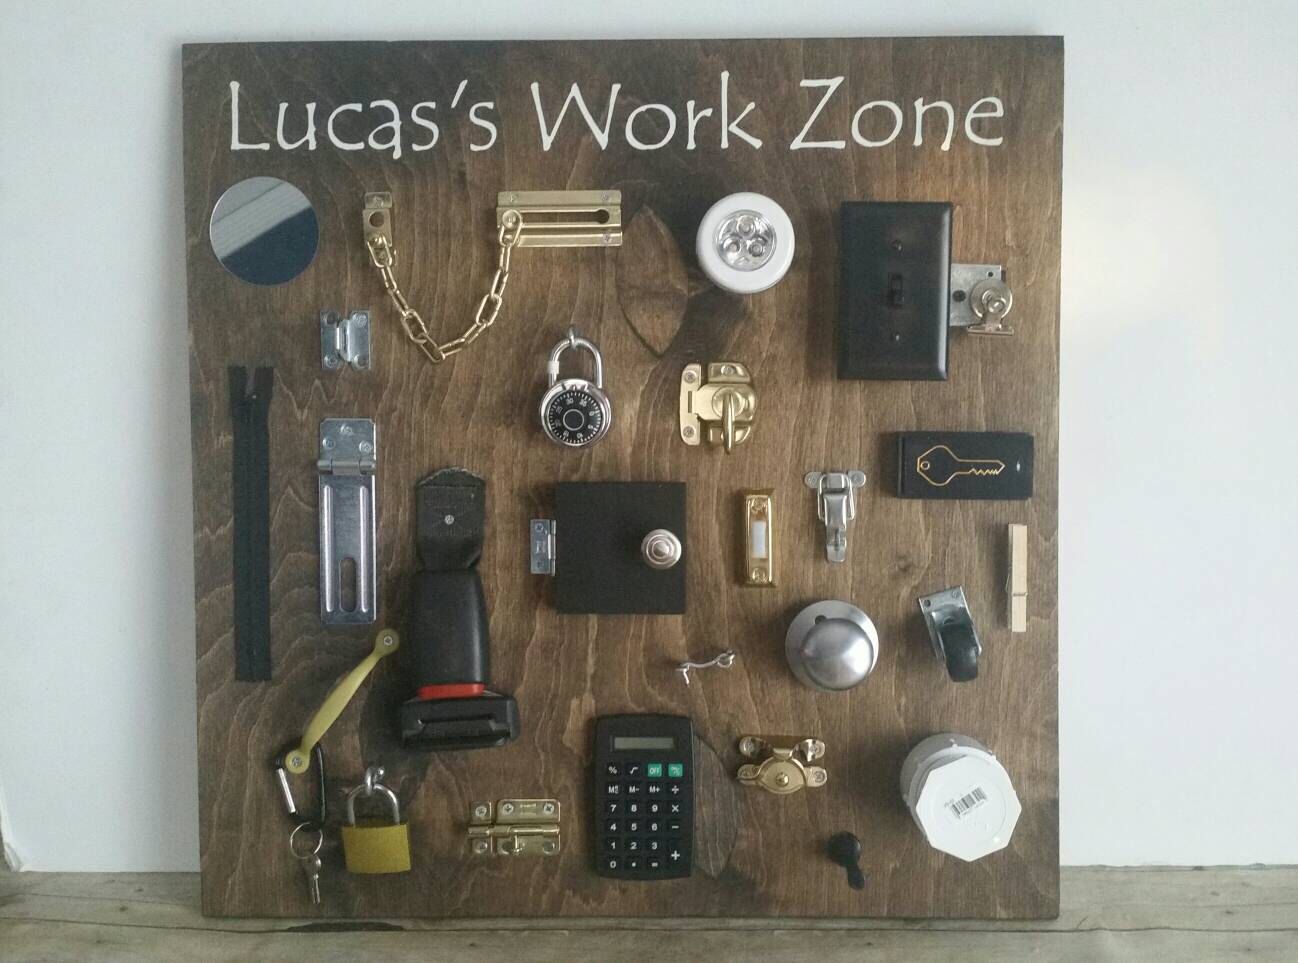
You may be wondering, “What exactly is a busy board?” Well, it’s basically a board filled with various activities and objects that toddlers can manipulate. Think of it as a sensory playground packed into a single piece of furniture! The activities can range from flipping switches and turning knobs to zipping up zippers and latching clasps – all of which help your tiny tots develop their problem-solving skills, improve their dexterity, and engage their imaginations.
>>>Buy now:
Why Make Your Own?
Now, you might be asking yourself, “Why should I bother making a custom busy board when I could just buy one?” And that’s a fair question! But crafting your own custom busy board gives you the freedom to personalize it to your child’s interests and developmental needs. If your little one loves animals, you can add animal-themed elements. If they’re fascinated by music, you can include mini instruments. Plus, let’s face it – crafting is fun! You’ll get some quality bonding time with your child while making something truly special together. So, let’s roll up those sleeves and get started!
>>>Read more: Teach Your Child Responsibility and Boost Confidence with this Simple Daily Task: Planting Seeds (Alfalfa, Grass, Beans, Etc…)
What You’ll Need
Before we jump into the crafting part, let’s gather our supplies. Here’s a simple list to get you started:
Basic Materials:
- A sturdy board: Plywood, MDF, or even a strong cardboard piece will work.
- Paint or wood stain (optional): If you want to give your custom busy board a splash of color, grab some non-toxic paint or stain.
- Sandpaper: To smooth out any rough edges.
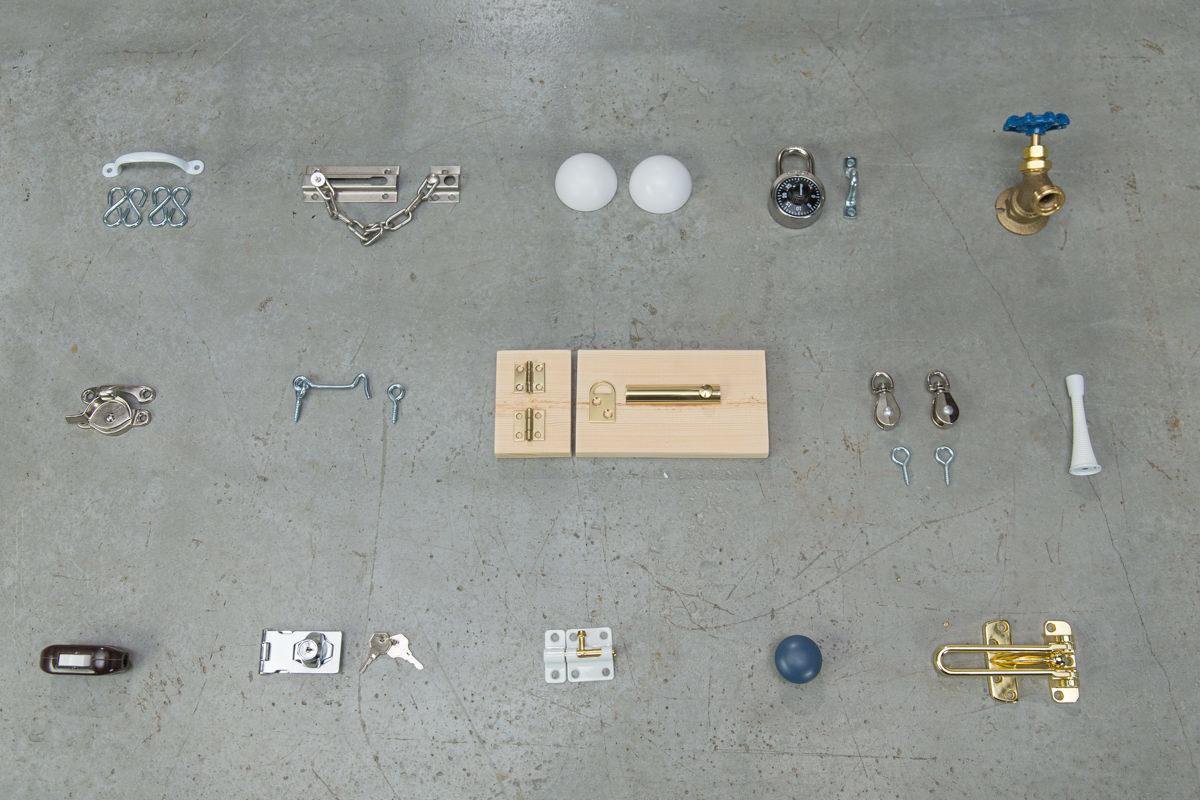
Activity Items:
Now for the fun part! Here are some ideas for items you can attach to your board:
- Switches: Old light switches, toggle switches, or even a small remote control can be fun to play with.
- Zippers and Buttons: Old fabric scraps with zippers, buttons, or snap buttons provide tactile experiences.
- Mirrors: A small piece of acrylic mirror is captivating for young children.
- Pulleys and Ropes: A simple pulley system with a rope can teach cause-and-effect.
- Locks: A simple latch or a tiny padlock can add some intrigue.
- Textures: Pieces of different fabrics (soft, rough, shiny) can be glued onto the board for sensory exploration.
- Mini instruments: Small bells, tambourines, or maracas for musical engagement.
- Numbers and letters: Add some learning with magnetic letters or numbers that can be moved around.
Tools:
- Drill or screwdriver: For attaching various elements.
- Hot glue gun: To secure items that don’t require screws.
- Scissors/utility knife: For cutting materials as needed.
Step-by-Step Guide to Creating Your Custom Busy Board
Alright, now that we have our materials, let’s dive into the creating process. Follow along and let your creativity flow!
Step 1: Prepare Your Board
Start by sanding down your board to avoid any splinters. If you’re feeling artistic, get creative and paint or stain your board. Consider using a fun pattern or bright colors to grab your child’s attention!
Step 2: Plan Your Layout
Before you start attaching everything, take some time to arrange your items on the board. You want to make sure everything has enough space and is at an appropriate height for your toddler. This is also a great moment to chat with your child about where they think things should go!
Step 3: Start Attaching Items
Once you’re happy with the layout, it’s time to start securing everything to the board. For screws, drill holes where needed and secure with a screwdriver. For lighter items, use a hot glue gun for quick attachment. If you’re using heavy items, make sure to reinforce them well, so they don’t fall off during playtime.
Step 4: Test and Tweak
After attaching everything, give your custom busy board a test run! Make sure each element functions correctly and is securely fastened. Don’t hesitate to adjust items if you think your child would enjoy them in a new spot!
Step 5: Supervised Exploration
Once your custom busy board is ready, introduce it to your toddler! Supervise them as they explore the new activities, and be excited with them. Talk about what they’re doing, ask questions, and encourage them to experiment!
Safety Tips
Here comes the important part – always ensure that everything you attach is safe for your toddler. Avoid any small parts that could pose a choking hazard, and keep sharp edges covered or smoothed out. Regularly check the Board for loose parts or wear and tear, and replace or fix anything that looks unsafe.
Ideas for Customization
One of the best parts of making your custom busy board is the endless possibilities for customization. Here are some additional ideas you can consider:
- Theme Boards: Create a board centered around a particular theme like ocean life or outer space.
- Seasonal Changes: Change out activities based on seasons or holidays.
- Personalized Items: Attach items that reflect your child’s interests or favorite characters.
Wrapping It Up
There you have it! Your very own custom busy board for toddlers, crafted with love and creativity. Not only is it an engaging activity for your little ones, but it also provides them with essential learning opportunities and hours of entertainment. Plus, you’ll have a fun story to tell about how you and your toddler collaborated on this unique project.
So go ahead, gather those materials, and let the crafting adventure begin! We’d love to hear how your busy board turns out or any other fun ideas you come up with along the way. Happy creating!