Blog
Customize Your Child’s Learning with a DIY Montessori Busy Board
Hey parents! If you’re anything like me, you know that keeping little ones engaged and learning can sometimes feel like a game of whack-a-mole—just when you think you’ve got one interest piqued, another distraction pops up! Well, what if I told you that you could harness that natural curiosity with a fun, hands-on learning tool called a Montessori busy board? And even better, you can create one right at home with your own personal flair! Let’s dive into why this might just be the perfect project for both you and your child.
So, What’s a Montessori Busy Board?
First, let’s talk about what a Montessori busy board is. It’s essentially a board decorated with various objects and materials that encourage children to explore, manipulate, and learn through hands-on play. Think of it as a sensory playground on a board! Busy boards are drenched in the principles of Montessori education, which emphasizes child-led exploration and learning at their own pace.
>>>Buy now:
What Are the Benefits?
Why should you put some time and effort into making a Montessori busy board? Here are a few really compelling reasons:
- Sensory Exploration: Kids learn best through their senses, and a busy board allows them to touch, see, and manipulate different textures and objects.
- Fine Motor Skills Development: Grasping, twisting, fastening, and pulling helps improve your child’s dexterity and hand-eye coordination.
- Problem-Solving Skills: Many Montessori busy boards involve puzzles, locks, or other elements that require some critical thinking to figure out.
- Independent Play: Once set up, a busy board can keep little hands busy while you tackle other, equally demanding tasks (let’s be honest—laundry doesn’t fold itself!).
- Customization: The best part? You can tailor the Montessori busy board to your child’s personal interests, ensuring it stays engaging!
>>>Read more: How crucial are sensorial activities for the growth of children?
Getting Started: What You’ll Need
Ready to create? Gather these supplies first:
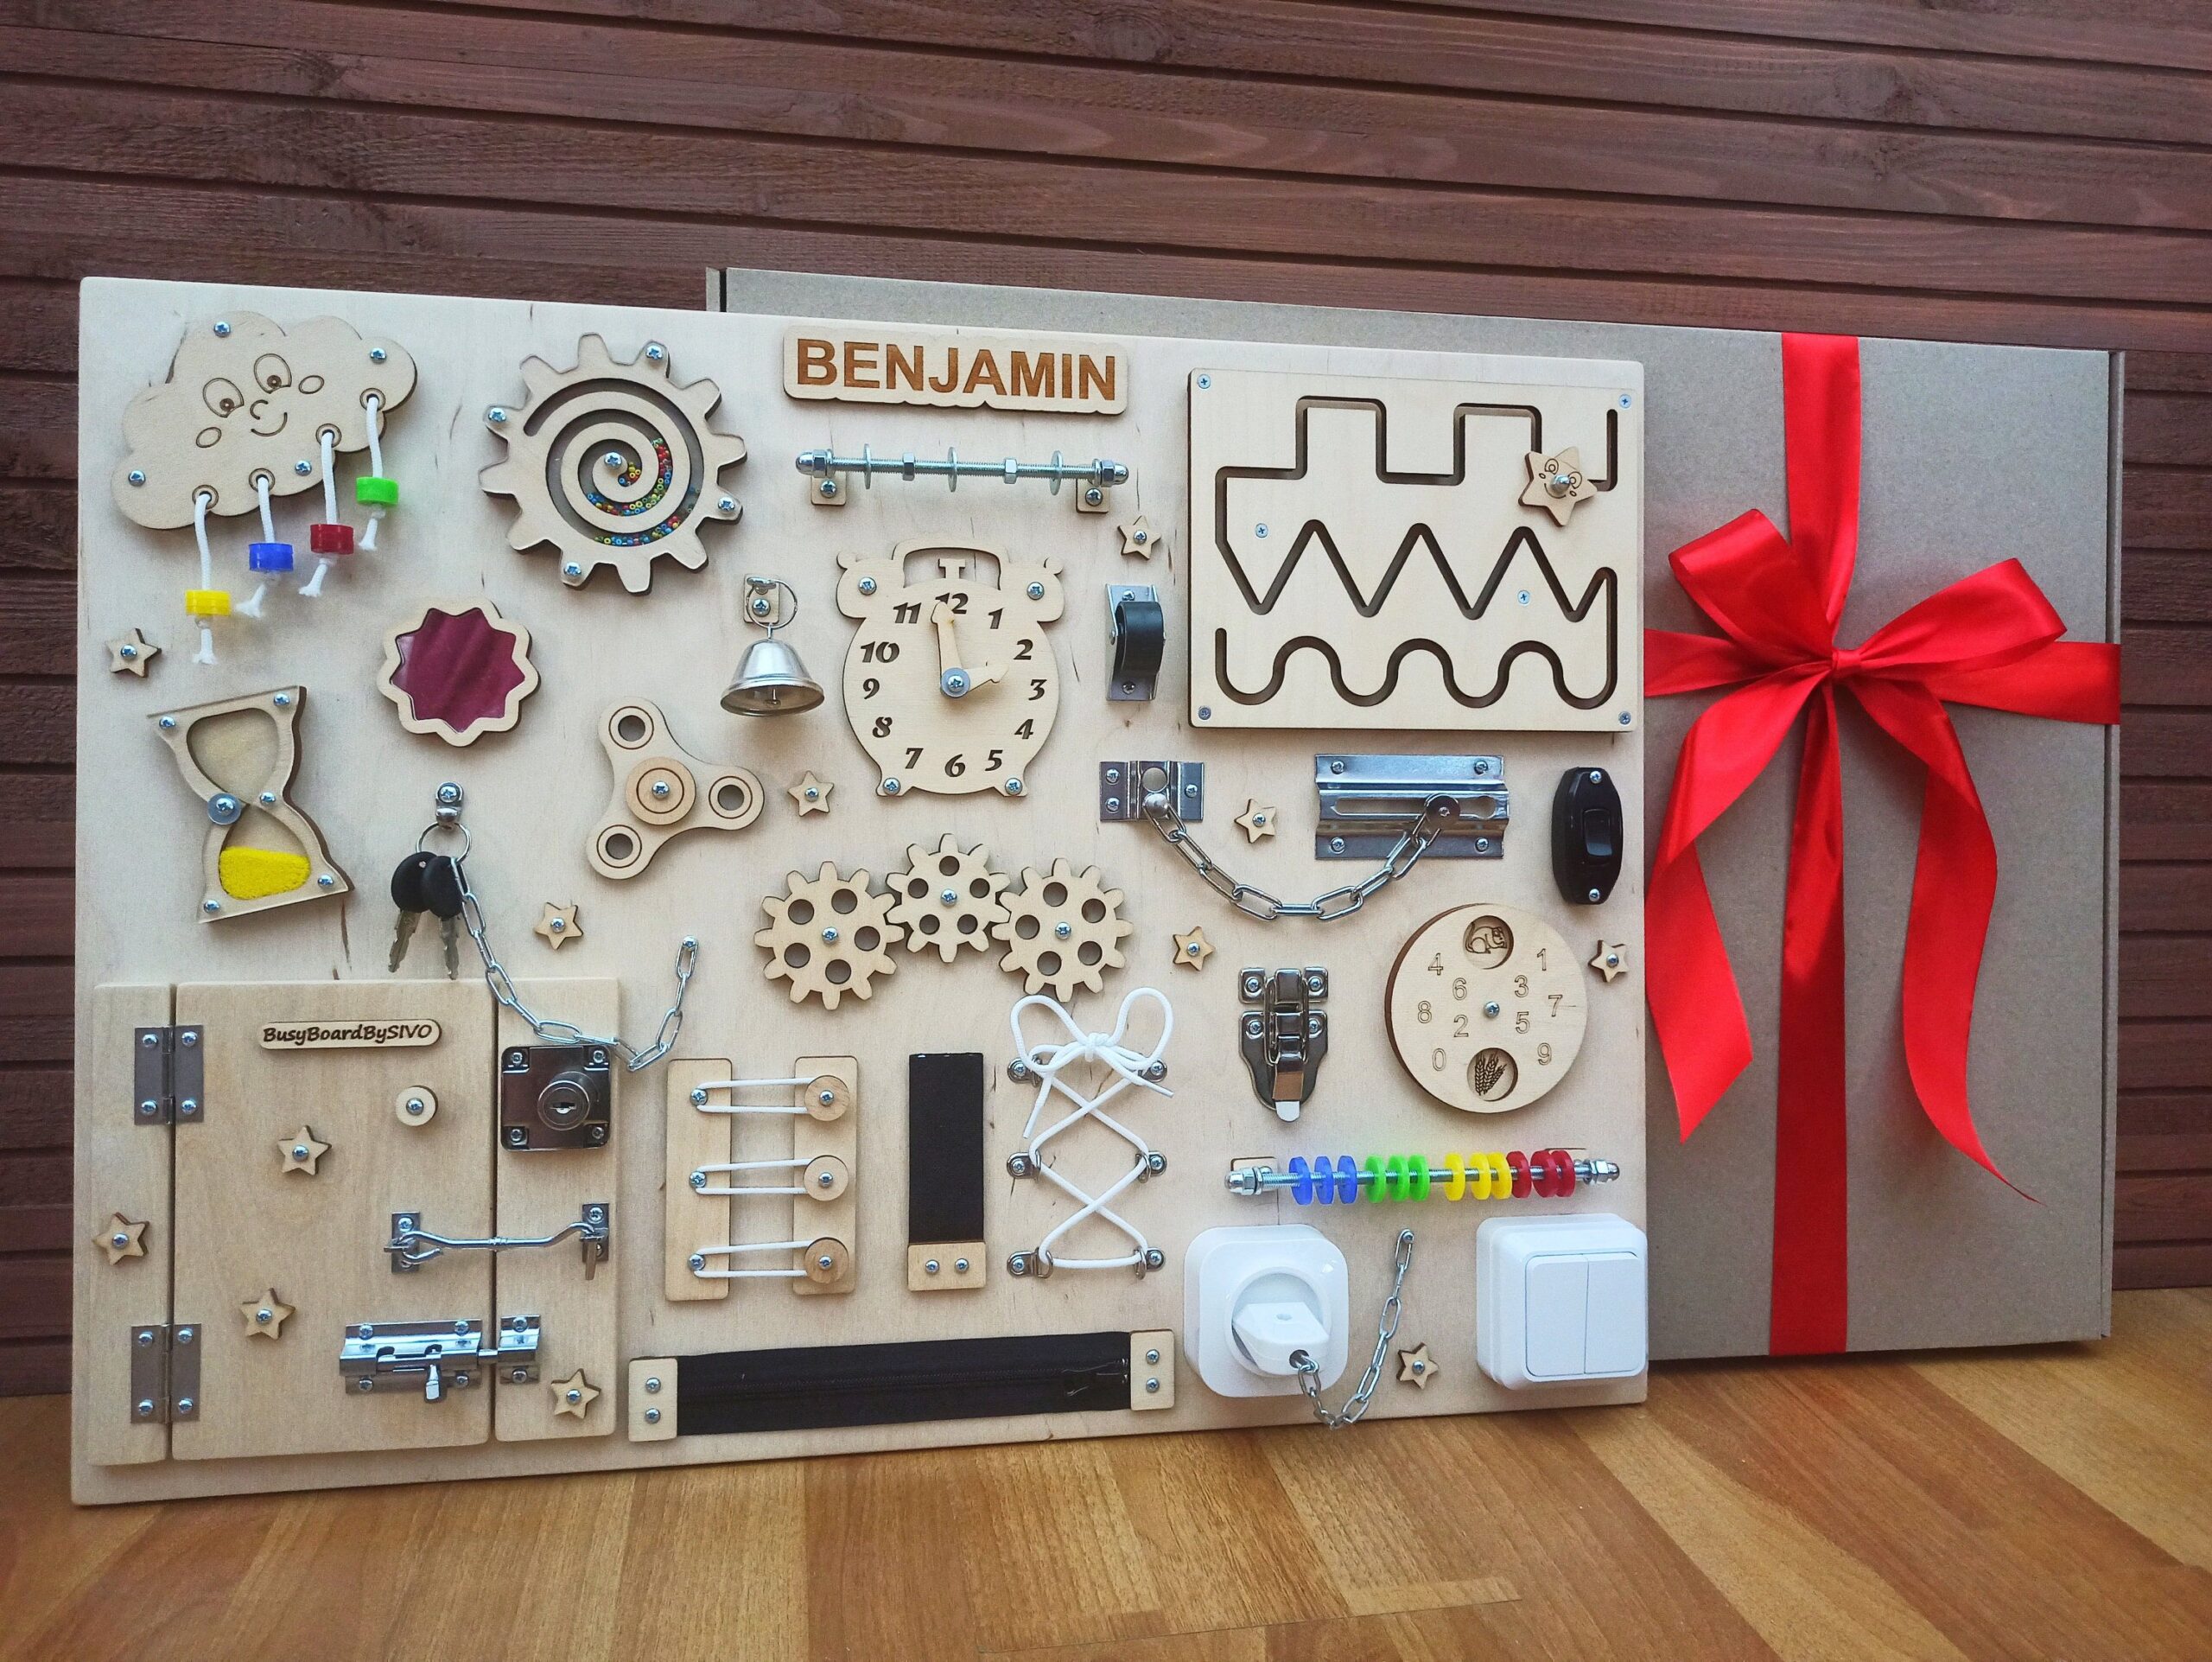
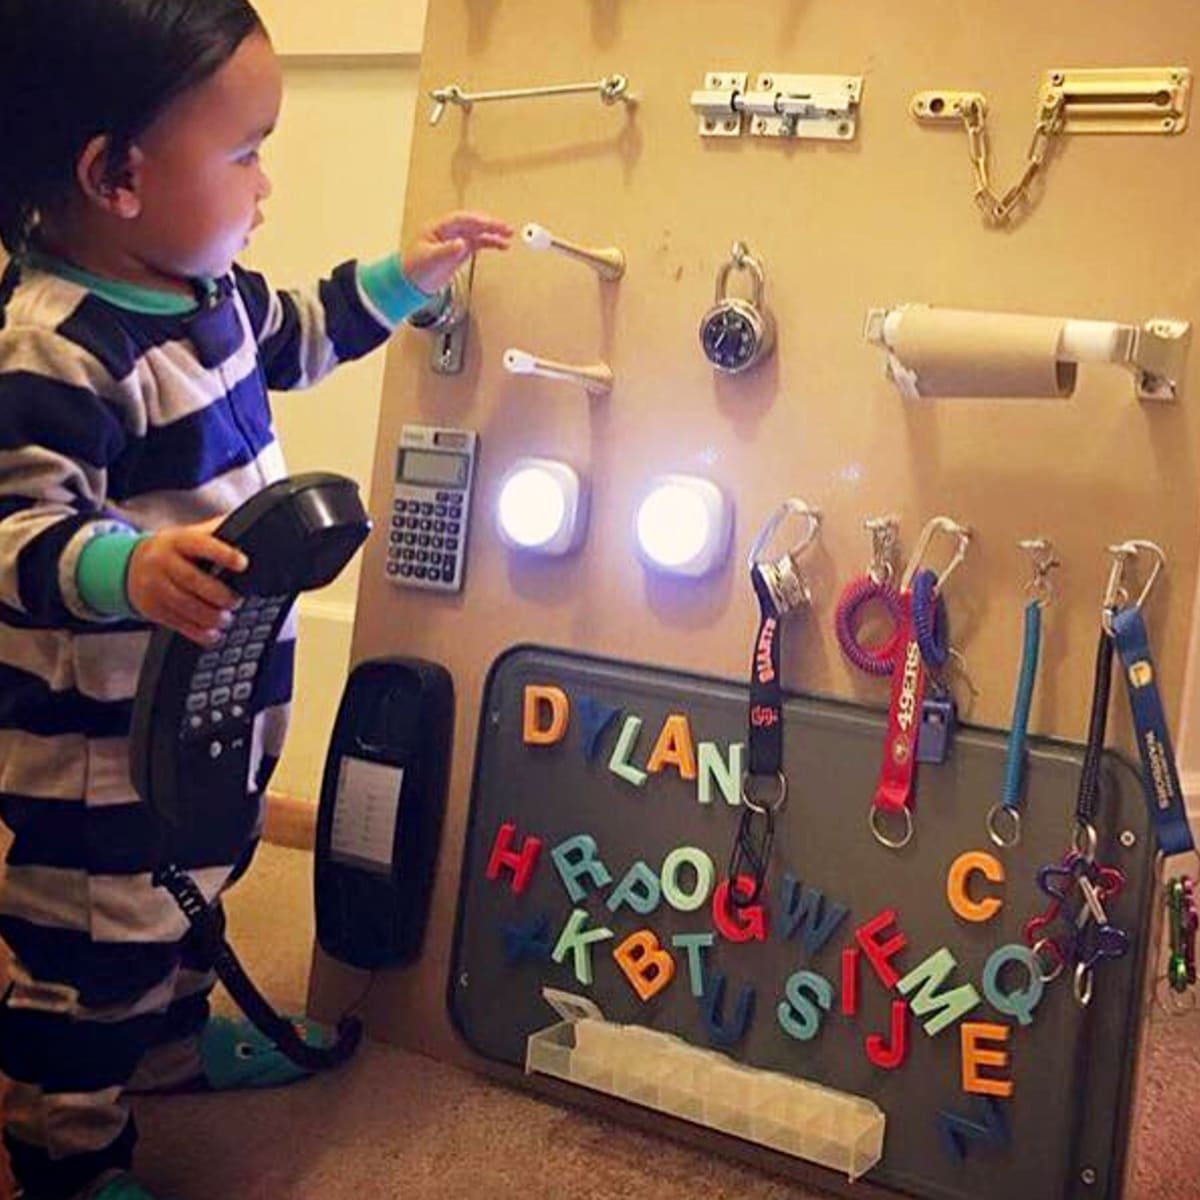
- A baseboard: Plywood, cardboard, or even an old picture frame can work as the foundation. Make sure it’s sturdy and safe for your age of children.
- A variety of items: This could include items like: Zippers and buttons, Velcro, Different types of locks and keys, Hinges, Gears, Mirrors, Small containers, Spinner toys… You can also incorporate natural elements like wooden blocks, fabric swatches, or safe kitchen utensils.
- Adhesives: Wood glue, duct tape, or hot glue will be your friends here. Just ensure that whatever you use is non-toxic and suitable for children.
- Tools: Depending on what you choose, you might need a drill, scissors, or a screwdriver.
- Paint or decorations: Get your creative juices flowing! Consider painting the baseboard to be visually appealing or use stickers to invite an artistic touch.

Step-by-Step Guide to Creating Your DIY Busy Board
- Brainstorm Ideas: Before you dive in, clarify what you want on your board. Ask your child what they’re interested in. Are they fascinated by animals? Colors? Numbers? Get their input—it’ll make the board even more engaging for them!
- Plan the Layout: Sketch a rough layout on paper. Leave room for larger items and ensure you won’t overcrowd the board. Different sections can be dedicated to various skills, like sensory elements, problem-solving activities, or motor skills.
- Prepare the Base: If you’re using wood, sand the edges to avoid any splinters. You may want to paint or decorate it at this stage, allowing it to dry before you glue on the items.
- Start Adding Items: Begin gluing or attaching each element to your board. Make sure everything is securely fastened. Safety is key, so ensure that there are no sharp edges and nothing is loose.
- Test It Out: Once your board is finished, invite your child to explore all its features! Observe how they interact with it and adjust as necessary—if something is too challenging, you can swap it out for something easier or vice versa.
- Make It Dynamic: One of the best parts of creating a Montessori busy board is that it can evolve with your child’s development. Swap out some items as they grow and gain new skills!
Tips for Keeping Things Fresh
Let’s be honest, kids can get bored quickly! Here are a few ways to keep your Montessori busy board exciting:
- Regularly Rotate Items: Change elements out to keep things fresh and challenging. This will also encourage continued exploration.
- Seasonal Themes: Tailor your board to the seasons or upcoming holidays! You could add winter decorations, spring flowers, or spooky elements for Halloween.
- Incorporate Learning Concepts: As your child learns new things, incorporate elements that reinforce what they’re learning at school. Think shapes, colors, numbers, and letters!
- Encourage Creativity: Give your child some safe, removable materials to add their touch. Maybe they want to add some artwork or even their own creations!
Conclusion: The Adventure Awaits!
Creating a DIY Montessori busy board is more than just a project; it’s an opportunity to bond with your child, foster their creativity, and provide endless fun while learning! Plus, there’s nothing quite like seeing the joy and excitement on their faces as they discover all the wonderful things you’ve crafted together.
So, gather those materials, tap into your inner artist, and get ready to embark on a creative journey with your little one. Happy building and may your Montessori busy board be as unique as your child’s wonderful imagination!